

An over-sink cutting board can add temporary prep space to a small kitchen, but it must match the sink’s support surfaces as well as its opening. Before buying, check the direction it spans, where its feet or edges rest, whether the faucet stays usable, and how you will wash and store the board. A board that merely reaches across the sink is not necessarily a secure fit.
Start with the sink model if you know it. For a workstation sink, a listed compatible accessory is a more useful starting point than an approximate size match. For a conventional sink, look for a board explicitly designed to span the opening and follow its fitting instructions.
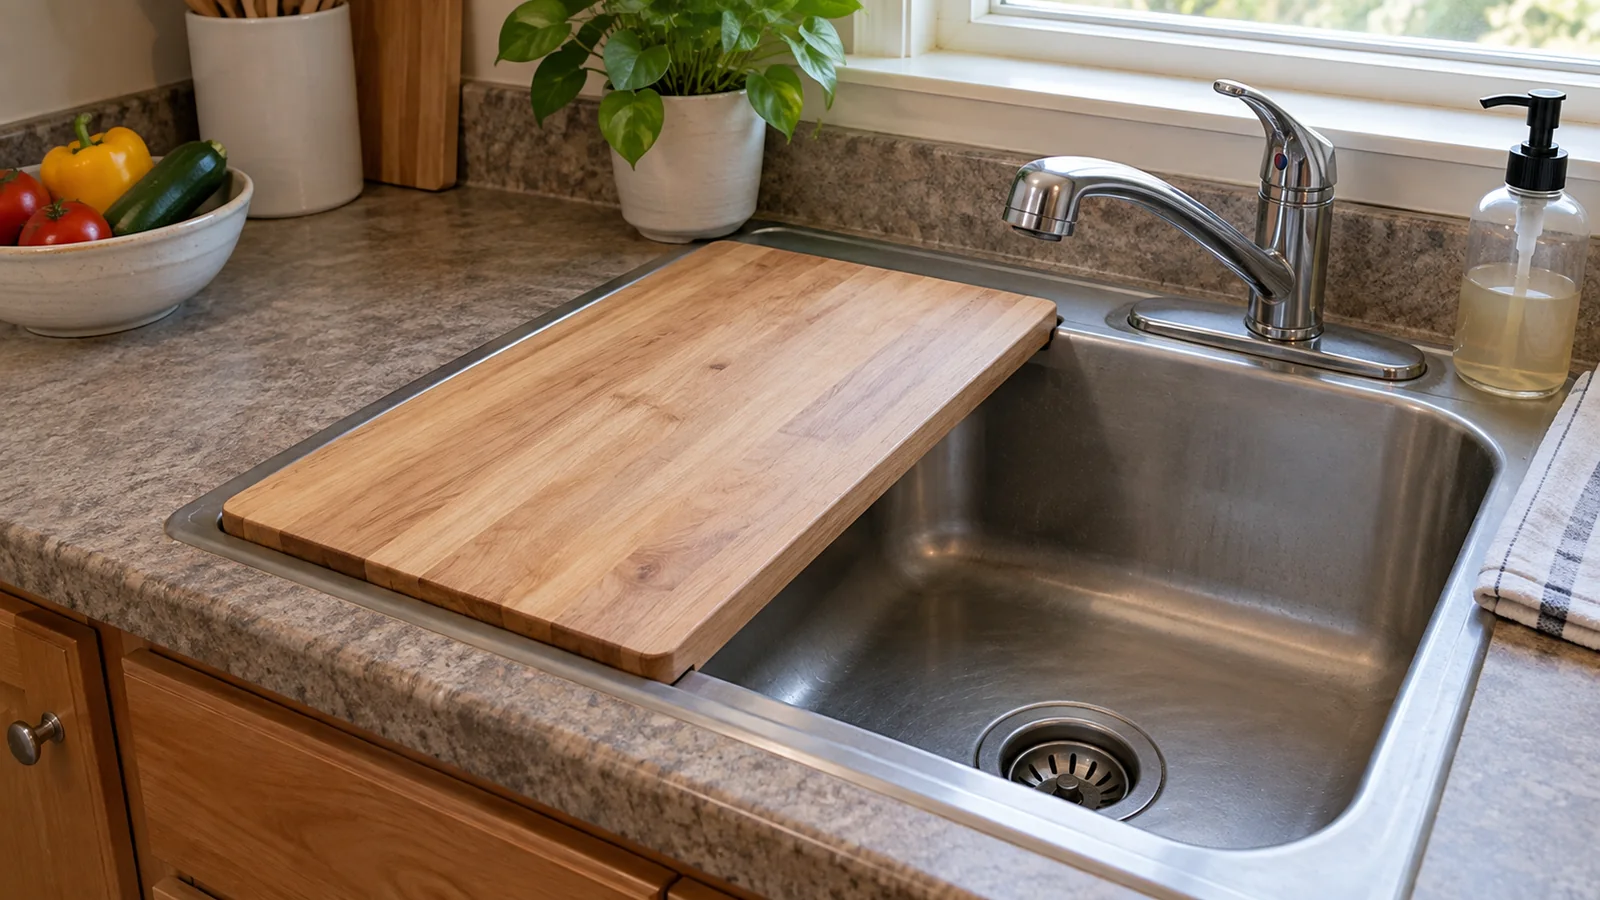
First identify how the board is supported
- Workstation board: sits on purpose-made ledges inside a compatible sink. Match the sink model, ledge geometry and accessory dimensions.
- Rim-spanning board: rests on the sink rim or surrounding surface according to its design. Raised rims, rounded corners and uneven edges can interfere with its feet.
- Expandable board: uses extending supports. Check the permitted sink-size range, how the supports secure, and any load or use restrictions.
Do not assume an ordinary countertop board or roll-up dish rack is suitable for unsupported cutting over a sink. The support arrangement is part of the tool.
Five checks before choosing an over-sink cutting board
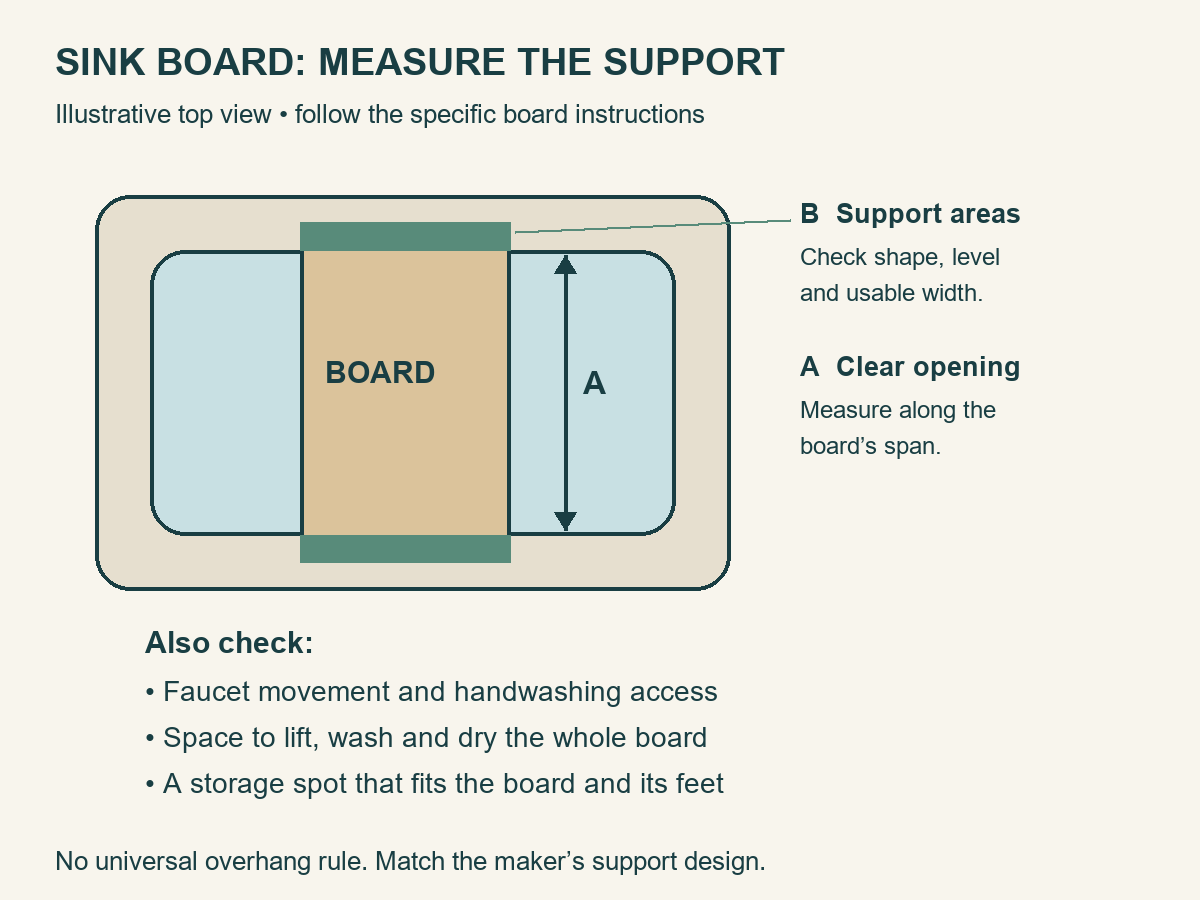
1. Measure the opening along the board’s span
Measure the clear opening where the board will actually sit, in the direction it is designed to bridge. Record both front-to-back and side-to-side dimensions so you do not confuse the orientation when shopping. On a double sink, note the divider’s shape and height rather than treating the two bowls as one rectangle.
For a workstation sink, record the ledge-to-ledge dimensions specified by the accessory maker. The outside width of the sink cabinet does not tell you the board fit.
2. Inspect both support surfaces
Measure the usable flat area on each side. Look for curved corners, a high rim, a faucet base or a soap dispenser that prevents the board from sitting where intended. Check that all feet or support edges can make their required contact at the same time.
There is no universal “add two inches” rule. The required overlap depends on the board’s design. If the listing gives only overall dimensions, ask the maker for the supported opening range and a diagram of the underside before ordering.
3. Leave usable sink and faucet access
Imagine the board loaded with chopped vegetables. Can you turn the faucet, pull out the spray head and wash your hands without moving it? Can water splash onto the food? A board covering an entire single basin may require a separate rinse-and-prep sequence, with somewhere safe to put the board when the sink is needed.
If a drying rack already occupies the sink, decide which item moves and where it goes. The dish-drying layout guide can help you choose a separate drying spot instead of making two accessories compete for the same opening.
4. Check the usable cutting area and working height
Overall board size can include handles, a colander or a phone slot. Compare the uninterrupted cutting area with a board you already find comfortable. Make a paper outline and set your usual mixing bowl beside it; use the outline only to judge space, never as a cutting or support test.
Also check the board’s thickness and the height at which it will sit. You should be able to stand close enough to work without reaching across the faucet or leaning against an unstable edge.
5. Measure the cleaning and storage route
Can you lift the board comfortably, rotate it under the faucet, clean both faces and reach its feet or grooves? A board that covers the sink can be awkward to wash in that same sink. Check its weight and decide where it will rest while drying.
Measure the intended cabinet opening, not just the interior shelf. Include feet and handles. If the board must stand upright, give it a secure place where it cannot fall and where it can dry before storage.
Two real examples of why size labels are not enough
IKEA lists the 19¼ × 13¾-inch LILLHAVET board as fitting sinks with an inner dimension of 15¾ inches. Its overall length and stated sink fit are different measurements. The same page specifies silicone feet and handwashing only. Use the instructions for the exact size and version you are considering.
Ruvati’s RVA1215 replacement board lists overall dimensions of 12⅞ × 10⅞ × ¾ inches and specifically names sink models RVH8215 and RVQ5215. It illustrates why “workstation” is not a promise of compatibility with every sink.
These are specification examples, not tested recommendations. Neither example establishes the fit of a different board or your existing sink.
Choose care requirements you can actually follow
Read the particular board’s cleaning instructions before deciding on a material. Do not assume every plastic board is dishwasher-safe or that every wood board needs the same maintenance. For instance, the LILLHAVET example above is polyethylene but still calls for handwashing.
FoodSafety.gov recommends washing cutting boards and utensils with hot, soapy water after preparing food, and using separate boards for produce and for raw meat, poultry or seafood. Plan that separation even if you have only one sink. Keep the sink accessible for handwashing throughout preparation.
Inspect the board’s condition as well as its fit. USDA’s cutting-board guidance says to replace boards that are excessively worn or have grooves that are hard to clean. Stop using a board over the sink if it warps, rocks or no longer seats properly.
Decide whether a sink board solves your problem
- Good candidate: compatible supports, enough cutting area, manageable weight and a clear wash-and-store routine.
- Reconsider: you must dismantle the setup whenever you wash your hands, or the only drying spot is also over the sink.
- Skip that model: the feet miss the ledges, the board shifts during a check without a knife, or the manufacturer cannot confirm the fit.
Once the board arrives, seat it exactly as directed and check for rocking or sliding before putting a knife to food. Do not improvise unstable shims to rescue a poor fit. A towel trick used on a solid countertop does not create missing support over a sink.
If the sink cannot spare its space, return to the apartment counter-space plan to compare clearing the existing counter with adding a separate work surface.
[…] provided it has a sensible route and does not obstruct another room. If there is no floor space, a properly fitted sink board may be worth checking […]
[…] to wash hands and produce, and you must remove the board for dishwashing. For a full fit check, see what to measure for a sink-spanning cutting board. Clean it between tasks. FoodSafety.gov advises washing cutting boards and other surfaces after use […]